Archive

Archive for the ‘MOSS 2007’ Category

Stand-alone Installation Story

December 13th, 2007 2 comments

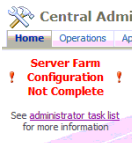
It is amazing that how small things in SharePoint can turn out to be puzzling and make you scratch your head for hours. Imagine , you are installing MOSS 2007 in a stand-alone environment , easiest installation of all , right? it’s a piece of cake for you and you’re pretty confident that you can get it done in a snap. Well, you are right because you install everything in couple minutes. It is 5:30 PM and it is time to go home (For those of you who don’t start your day at 10 AM like myself and go to bed next day at 2:00 AM 😉 ).Your site comes up with no problem and last thing you would like to check is Central Administration Site. First thing that catches your eyes is that RED sign on the left side of the page saying that you are not done yet. Shoot! – Sorry , but Central admin doesn’t care that you have a wife at home, and children, and hockey match to watch, and you love your country. It keeps complaining until you FIX him!!

Okay, what’s the quickest way to get rid of this without going through administration task list?

1) Start Excel Services, WSS Search ,MOSS Search

2) Provision SSP (Shared Services)

3) STOP Excel Services, WSS Search, MOSS Search (if you don’t need em)

When you start “Windows SharePoint Services Search” , you get the following page to fill out:


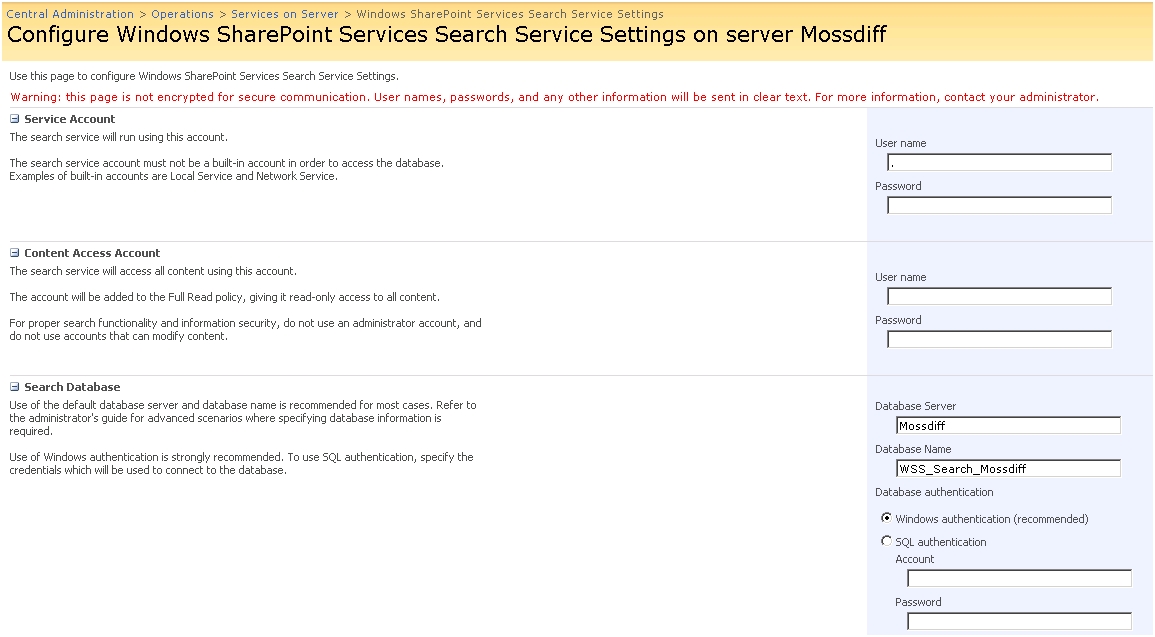
You are installing this in a single server topology , so you go ahead and fill out User Name fields with a local accounts and you hit “OK”.


You get this error in 12 Hive log file:

The call to SPSearchServiceInstance.Provision (server Mossdiff’) failed. Setting back to previous status ‘Disabled’. Setting back to previous status’ Disabled ‘.

If you don’t come across this post or another hint posted somewhere, it probably takes you a while until you figure out that you have to use ComputerName\AccountName in User Name fields to get around this issue.


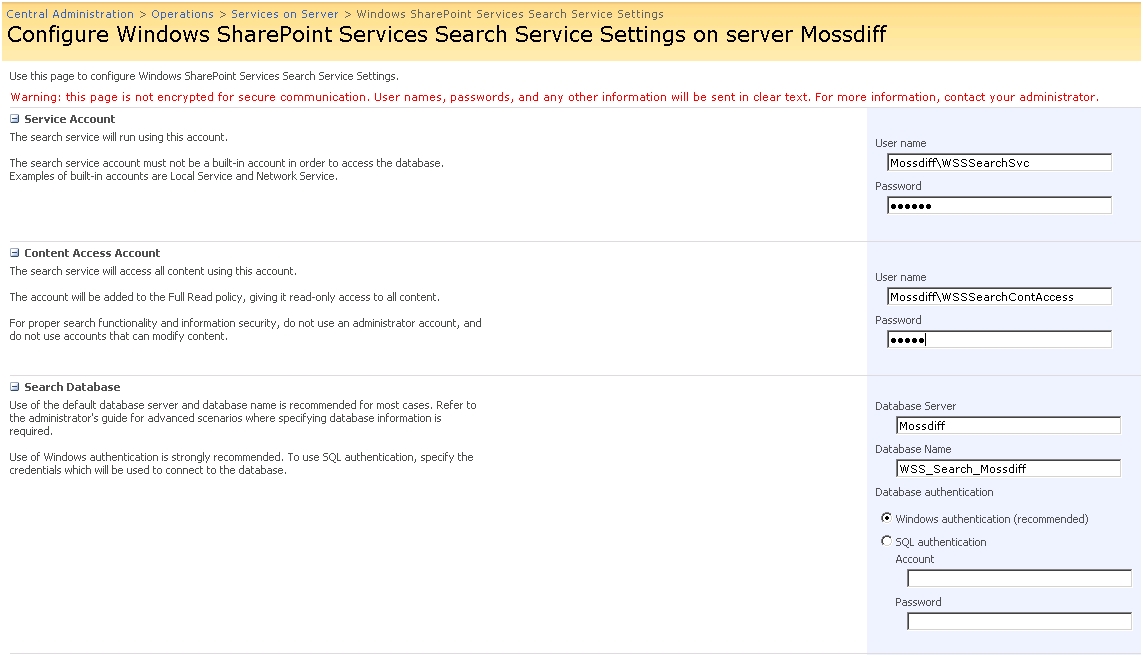
Same thing applies to MOSS Search settings too. Either use Computer Name\Account Name or Domain Name\Account Name. Please, please read the descriptions besides each section carefully, for some sections such as “Service Account” you shouldn’t use a built-in account (i.e. Local Service or Network Service) for security reasons and for it to access the database and content index and for some sections such as “Content Access Account” you shouldn’t use an administrator account. Those descriptions are not there to fill out the page with. They are there for us to read and decide what action to take. Another important thing here is when you set up your SSP site. When you are setting SSP , make sure that you choose the right process account for its application pool otherwise the new site you create for SSP won’t be listed under current Web Applications that you can choose for SSP. It is 8 PM and you are still at work or maybe you have read this post and I have been able to save you some time .Either case, have a good night and never underestimate SharePoint 😉

Categories: MOSS 2007 Tags:

Installing Team Foundation Server in single Server Mode (WSS 2.0)

November 4th, 2007 4 comments

I have installed TFS couple of times, but it has been always in a dual-server mode which basically puts the Team Foundation data and the application tiers on separate computers. Last week, I was asked by a colleague of mine to give him a hand on installing TFS in a single server mode. Well, I am not a TFS expert, but when it comes to a technology that somehow relates to SharePoint somewhere, I step in and learn enough about that technology to protect myself for rainy days in future. As a result, I have been involved in many integration projects that SharePoint is the other end or it is used under the hood. Despite the fact that I am known for 100% SharePoint architecting and dev , I *really* enjoy this type of work a lot more.It is much more fun plus the exposure you can get to other complementary technologies around SharePoint. Obviously, the challenge is always to stay focused and indeed not to be derailed.Okay, back to the issue. I agree wholeheartedly that TFS documentation is really good , but I think it is a bit complicated for many users, definitely lacks some screenshots and a very important tip which is the fact that TFS expects SharePoint configuration database to be called STS_Config_TFS. One other thing that I have found very important (and not emphasized enough in the documentation) is to create and use right user accounts for various steps during the installation process.Having said this , I decided to create a document that describes the installation steps in a more summarized way along with many screenshots of the important steps.

Categories: MOSS 2007, TFS Tags: ,

Getting user login from the PeopleEditor via Code

October 4th, 2007 1 comment

Assuming you have a people editor control defined like below:

<wssawc:PeopleEditor AllowEmpty=”false”  ID=”myPeopleEditorControl” runat=server SelectionSet=”User” MaximumEntities=”1″ MultiSelect=”false” AllowTypeIn=”false” Width=’500px’ />

The following code sample will get you the currently logged on user’s login from the PeopleEditor control:

  ArrayList peEntities = myPeopleEditorControl.Entities;
  PickerEntity pickEn = (PickerEntity)peEntities[0];
  stringLogIn = pickEn.Key;

This comes handy when you want to create an SPUser context out of the entities kept in the PeopleEditor control. For example:

 private SPUser GetUser(string logIn)

        {
             SPUser user = this.workflowProperties.Web.SiteUsers[logIn];
             return user;
        }

Don’t forget Required Field Validation on your people editor control if you want the code not to break on you.

Categories: MOSS 2007 Tags:

Item Level Permission in workflow CreateTaskXXX activities

September 27th, 2007 11 comments

Both CreateTask and CreateTaskWithContentType  activities  have a property called ” SpecialPermissions ” that takes a hashtable of key-value pairs of type string and SPRoleType. Setting the SpecialPermissions property  in your code will strip out all existing permissions inherited from the parent list(Workflow Task List) and only adds permissions for each pair you added to the hashtable .

   private void createTask(object sender, EventArgs e)
{
…….
CreateTask task1 = sender as CreateTask;
HybridDictionary permsCollection = new HybridDictionary();
permsCollection.Add(taskProps.AssignedTo, SPRoleType.Administrator);
task1.SpecialPermissions = permsCollection;
}

Alternatively, If you are using “CreateTaskWithContentType” activity, you have one other option : The event handler bound to your content type. Here is how I’d do it:

1) I create the Task using “CreateTaskWithContentType” activity from my workflow. Obviously, I already have a content type in place.

2) I have also attached an event handler to the content type I use above. Oops! I forgot to say that there is no way you can visually do that (except this one), so I use a programmatic approach to assign an event handler to my content type when the feature that contains my content type get activated.

3) So I have to create a Feature that contains the content type (MyTaskContentType.xml is content type definition which I will skip for the sake of code brevity)

<?xml version=”1.0″ encoding=”utf-8″ ?>
<Feature Id=”5FED1202-C6B8-453e-9EC0-F328655ED4DC”
Title=”My Workflow Task Content Types”
Description=”….”
Version=”12.0.0.0″
Scope=”Site”
xmlns=”http://schemas.microsoft.com/sharepoint/
ReceiverAssembly=”DevHorizon.SharePoint.Workflows, Version=1.0.0.0, Culture=neutral, PublicKeyToken=207a12b7817b805c”
ReceiverClass=” “DevHorizon.SharePoint.Workflows.AddConentTypesEventHanlders”>
<ElementManifests>
<ElementManifest Location=”DivRepTask.xml” />
<ElementManifest Location=”HRAdminTask.xml” />
</ElementManifests>
</Feature>

4) I create a feature receiver class for this feature, I get a reference to the content type and attach the event handler to it programmatically:

public override void FeatureActivated(SPFeatureReceiverProperties properties)
{
using (SPSite siteCollection = (SPSite) properties.Feature.Parent)
{
using (SPWeb web = siteCollection.OpenWeb())
{
System.Reflection.Assembly a = System.Reflection.Assembly.GetExecutingAssembly(); SPContentType ctMyTask = web.ContentTypes[“My Conent Type”];
ctMyTask.EventReceivers.Add(SPEventReceiverType.ItemAdded, a.FullName,”MyTaskItemEventReceiver”);
ctMyTask.Update();
web.Update();

}
}
}

5) Now,I need to create an event handler class named “MyTaskItemEventReceiver” that inherits from SPItemEventReceiver.Make sure you decorate this class with the right attributes to target to the featureId that contains your content type and the content type Id that you are writing this event handler for. You also need a unique GUID for your event handler

[TargetContentType(“feature id goes here”, “content type id goes here”)]
[Guid(“and here is the unique id for your enevnt handler”)]

6) In ItemAdded method of your event handler add the following code:

DisableEventFiring();
SPListItem listItem = properties.ListItem;
try
{
listItem.BreakRoleInheritance(false);
listItem.Update();
listItem =SetItemLevelPermissions(listItem.Web, listItem, SPRoleType.Contributor, listItem[“Assigned To”].ToString());
listItem.Update();
}
catch (Exception ex)
{
//Add error handling code here
}
EnableEventFiring();

7) And finally add this helper method somewhere accessible from within your event handler

public static SPListItem SetItemLevelPermissions(SPWeb setSPWeb, SPListItem setListItem, SPRoleType setRoleType, string assignedTo)
{
int index = assignedTo.IndexOf(‘;’);
int id = Int32.Parse(assignedTo.Substring(0, index));
SPUser user = setSPWeb.SiteUsers.GetByID(id);
SPRoleDefinition roleDefinition = setSPWeb.RoleDefinitions.GetByType(setRoleType);
SPRoleAssignment roleAssignment = new SPRoleAssignment(user.LoginName, string.Empty, string.Empty, string.Empty);
roleAssignment.RoleDefinitionBindings.Add(roleDefinition);
setListItem.RoleAssignments.Add(roleAssignment);
return setListItem;
}

Now when your workflow creates a task, its item level permission will be broken and set to “assigned to” field.Happy ending!

Categories: MOSS 2007 Tags:

Programming under the influence

September 26th, 2007 2 comments

Let’s say you have a list (i.e.task list ) for which you need to capture ItemAdded event using an event handler and You have to do something unusual like the following:

[SharePointPermission(SecurityAction.LinkDemand, ObjectModel = true)]
public override void ItemAdded(SPItemEventProperties properties)

        {
            SPListItem testtask = properties.ListItem.ParentList.Items.Add();
            testtask[“Title”] = “You are fired!::” + DateTime.Now.ToString();
            testtask[“Due Date”] = DateTime.Now;
            testtask[“Priority”] = “(1) High”;
            testtask.Update();
        }

Well,You are trapped in a loop. How? Somebody adds  a task and your event handler fires and adds another task and  so on and so forths. I know this may sound stupid to do, by my point is something else here. Event handler OM is now smart enough not to let you get trapped in an infinite loop ,so recursion depth in such case is set to 10 (for itemAdded) and looping only occurs 10 times. It is really cool! Look at the picture below:

 If you really have to do such a thing then at least use DisableEventFiring() and EnableEventFiring(); to stop the event handler from firing 10 times. 

[SharePointPermission(SecurityAction.LinkDemand, ObjectModel = true)]
public override void ItemAdded(SPItemEventProperties properties)
    {
       DisableEventFiring();
       SPListItem testtask = properties.ListItem.ParentList.Items.Add();
       testtask[“Title”] = “You are fired!::” + + DateTime.Now.ToString();
       testtask[“Due Date”] = DateTime.Now;
       testtask[“Priority”] = “(1) High”;
       testtask.Update();
       EnableEventFiring();
     }

Categories: MOSS 2007 Tags: