Adding Additional Farm Admins to an Existing Farm

March 7th, 2012 2 comments

Scenario: You have installed a SharePoint farm and life is great in your company with you being the only person who looks after that farm! Your employer is kind enough to hire a new resource to help you out. You have been asked to make the new hire a farm admin too.

Problem: Adding additional farm administrators is not a straight forward process as the SharePoint central administration site makes it look like! Just by adding the new user to the the farm administrators group in central administration, it means pretty much nothing! Unless you remember to update different security groups here and there, you could be left wasting hours on troubleshooting. To hopefully save you some time and headaches, here is a process to give a user farm admin privileges.

Solution:

1. To start off, create an AD Group for SharePoint administrators. We’ll use “SharePoint Server Admins” as the name.
2. Add the “SharePoint Server Admins” AD Group to the BuiltIn\administrators group on each server in the farm.
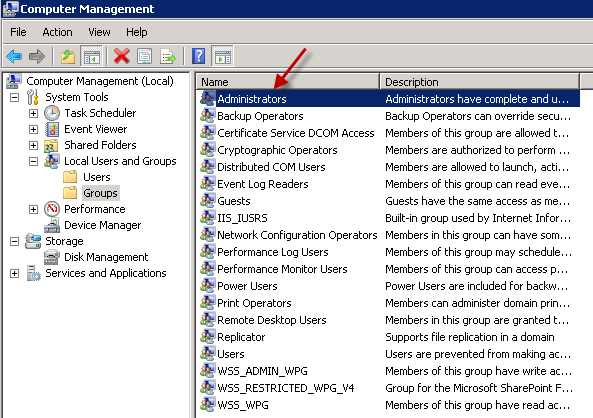
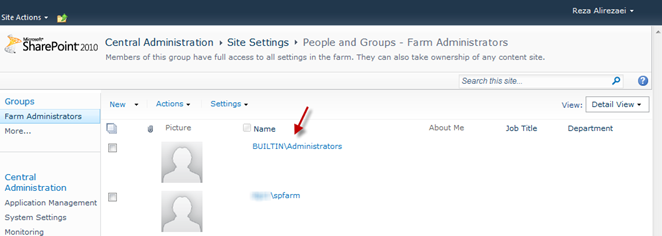
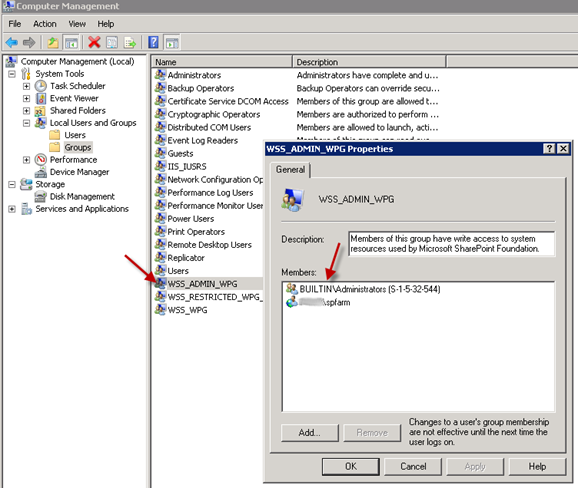
Note: the (BUILTIN\Administrators) group is already referenced in both the Farm Administrators group in Central Administration and the local WSS_Admin_WPG group as shown in the following two figures:

Central Administration Site > Security > Manage the farm administrators group
WSS_Admin_WPG group
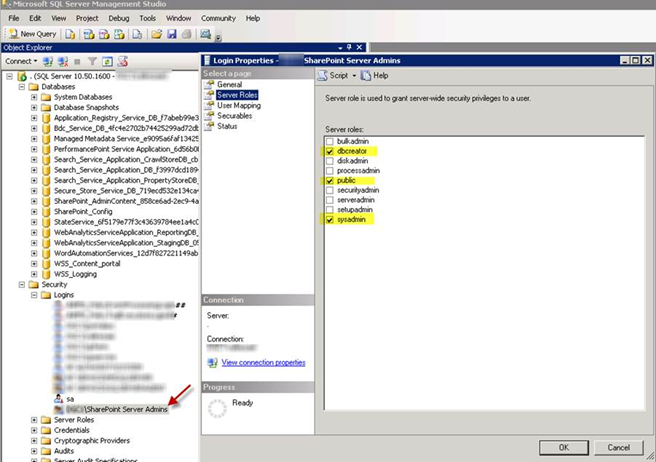
3. Open SQL Management Studio and add the “SharePoint Server Admins” group as a server login with dbcreator, public, and sysadmin server roles as documented here.
4. In the properties of the new SQL login created, go to he User Mappings section. In the mapped databases select the central administration and config databases and ensure that public and db_owner role memberships are checked. For the config database you will also want to select the SharePoint_Shell_Access role membership to give farm administrators the access to execute PowerShell against the farm.
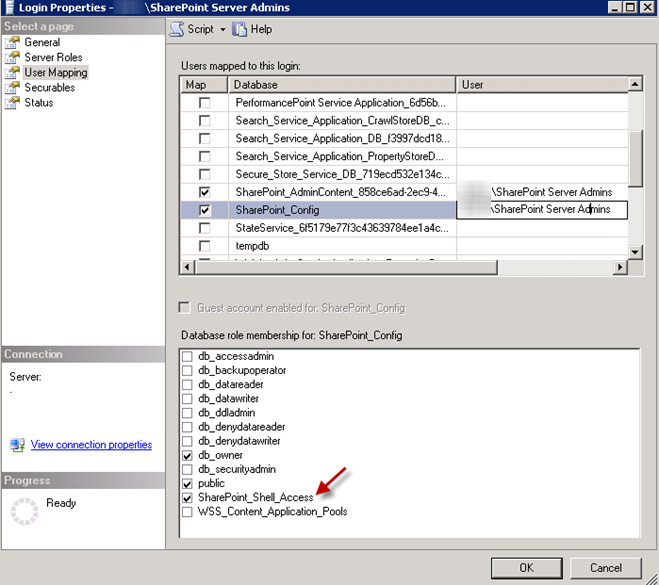
5. Add the new farm admins to the “SharePoint Server Admins” AD Group.

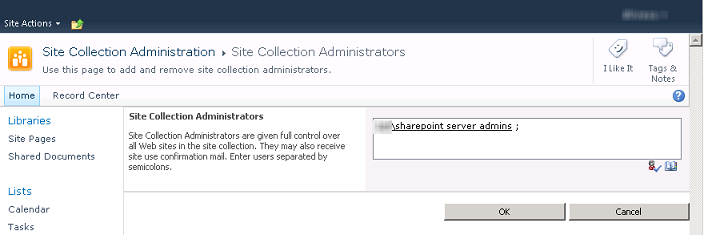
6. Additionally, if you want to give administrator access to the site collections created, add the “SharePoint Server Admins” group to the Site collection administrators of each site collection. Note that to add a domain security group in the site collection administration group in SharePoint Foundation 2010 you need to apply KB 2597136 which was just released today.


[Update 03/16/2012] As per Marco’s comment below, you can also add a user policy (Full Control) for each Web application if you want your SharePoint Server Admins group to access all site collections with the same set of permissions. See the instructions here.

Now we have successfully added a new AD Group to the SharePoint Farm Administrators, which this will allow us to add new users through one centralized location (AD). This makes adding users simpler by not having to add users individually to each of the places described above. Nice, easy, and centrally managed. Enjoy!

P.S. Below you will find some other related issues and workarounds:

http://sensoft2000-sharepoint.blogspot.com/2010/06/new-ribbon-icon-disabled-in-central.html
http://spdeveloper.net/2010/06/you-cant-create-web-applications-in-central-admin-even-if-youre-farm-admin/
http://social.msdn.microsoft.com/Forums/en-US/sharepoint2010general/thread/e1f3deee-75c1-402a-8e9f-6c5ff15796b7/
Categories: SharePoint 2010 Tags:

Setting My Regional Settings

December 16th, 2011 No comments

The quesion that came up today was if the SharePoint Server is set to a specific time zone and users are all around the world, how would I programmatically set the right time zone under “My regional settings” for those users in a batch operation?

SPUser object has a property called RegionalSettings by which you can change the regional settings per user.First you need to create an SPRegionalSettings object, set its TimeZone.Id to whatever you wish.

[CSharp]
SPRegionalSettings spReg = new SPRegionalSettings(web, true);
spReg.TimeZone.ID = 10; //Toronto
[/CSharp]

Get the list of all available time zones from here, see the offical MSDN documentation here.

As you can see, SPRegionalSettings takes two parameters, the SPWeb and a boolean. Make sure you pass true to specify that the regional settings object you are creating pertains to the user not the web. Finally set the RegionalSettings property to the settings that you just created above.

[CSharp]
user.RegionalSettings = spReg;
[/CSharp]

user and web variables are your SPUser and SPWeb objects which can be obtained in several ways depending on how you want to go about this. If you are looping through a lot of users to apply this change, you may want to factor in the performance impact and the time required to get this done.

Categories: MOSS 2007, SharePoint 2010 Tags:

Switching back to SP2007-Style Web Part Gallery

November 1st, 2011 No comments

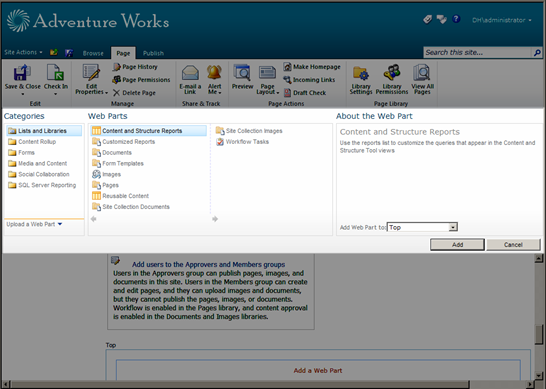
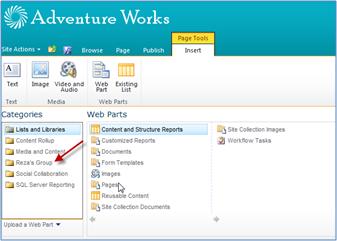
As you probably know, Web Part Gallery and the way web parts are added to the page are completely changed in SharePoint 2010. The following picture, shows the new Web Part Gallery and its new positioning on the top of the page:

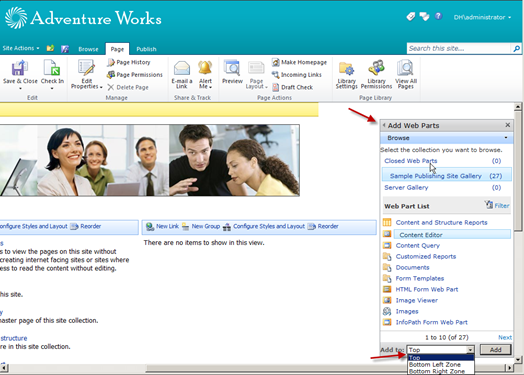
While this is great, there might be cases in which you want the Web Part gallery to appear in the right side of the page (like good old SP2007 time). Since SharePoint heavily depends on URLs to accomplish various tasks, URLs come handy in this particular case again! First, check out the page. Then append ?PageView=Shared&ToolPaneView=2
to the page URL and hit the Enter. Now, your page should look like this:

Add your Web Parts from the gallery, check the page back in and finally publish it.

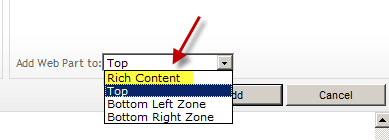
Obviously, with switching back to SP2007 Web Part Galley style, you will lose some of the new features. For example, SP2010 Web Part Galley allows you to add Web Parts to the rich content areas (such as Wiki pages) as shown in the picture below, but the old gallery only adds to the Web Part zones. That’s the first difference!

The second difference is that the new Web Part Gallery uses WebPartAdder class which you can use to dynamically populate the gallery from different sources including the Web Parts deployed to the server. See Wictor’s post here for more information.

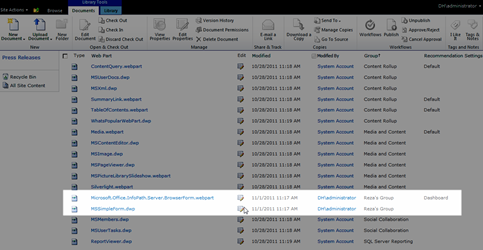
It’s imperative to note that both approaches allow you to bucketize your Web Parts into the groups that you want. If you go to Site Settings > Galleries > Web Parts. You will find all the Web Parts deployed to the server. As you can see the gallery (which is essentially nothing but a list) has a column called Group. You can go ahead and edit group column for each Web part and add your own grouping as shown in the following picture:

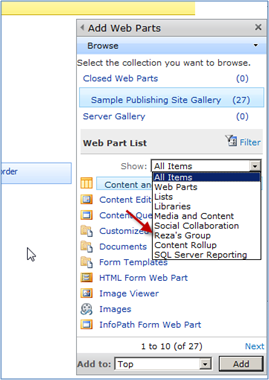
Then, the new group will show up in both gallery types as shown below:

Categories: MOSS 2007, SharePoint 2010 Tags:

Call for Speakers: SharePoint Summit 2012 (Toronto)

October 17th, 2011 2 comments

On behalf of the SharePoint Summit Board of Directors, I am excited to send out this Call for Speakers for SharePoint Summit 2012 which is being held in Toronto from May 14th to 16th, 2012.

This is a great opportunity for you to showcase your expertise and knowledge of SharePoint as part of a group of SharePoint experts and thought leaders. With over 600 people expected to attend SharePoint Summit 2012, this will be one of the SharePoint community’s most important events.

All speaker applications will be presented to the selection committee which has been created in order to ensure that the topics and speakers being submitted will bring value and help attendees in optimizing their SharePoint installations. To meet the needs of our attendees, we want to target presentations for both technical and business-oriented audiences. This means we are looking for presentations that will not only help developers and IT management plan and architect successful SharePoint solutions, but we also want to pay particular attention to topics that will help business decision makers, business analysts and information architects ensure that they can use SharePoint as a platform to drive business value. Clear abstract and proper level (100,200, etc) is very important in the selection process.

Please take a look at the suggested topic areas below as you prepare your application submission. Consider also whether your presentation is directed to those who are new to SharePoint (Level 100) or those who are more advanced in their knowledge and expectations (Level 300). We are looking for a good mix of content to address attendees with differing levels of experience.

Presentations will be categorized by level, target audience, and general topic:

LEVELS
100 – Introduction
200 – Intermediate
300 – Advanced

AUDIENCES
Developer
Business Manager
Architect
Project Manager
IT Management
IT Professional

TOPICS
Development
Administration
Architecture
Business Solutions
Information Architecture
Best Practices
Case Studies

If you wish to submit a session, please go to: http://www.sharepointsummit.org

Submission Deadline: October 25th, 2011

For more information on SharePoint Summit 2012 and becoming a speaker please do not hesitate to contact me at reza@sharepointsummit.org

Categories: SharePoint 2010, UG/CodeCamp Tags:

Detecting the Personalized View of a Publishing Page

August 2nd, 2011 1 comment

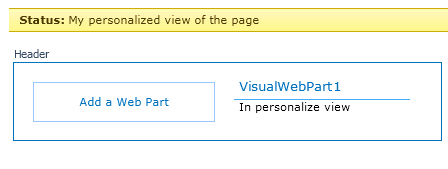
The requirement is pretty straightforward : Show a coaching statement in each Web Part placed in the personalized view (personalized view != shared view).

One would imagine that SPContext.Current.FormContext.FormMode would let you detect if a page is put in the personalized view, but that’s not the case! Instead, Web Part manager handles this.

To accomplish this, do the following in your Web Part:

[CSharp]
if (WebPartManager.GetCurrentWebPartManager(this.Page).Personalization.Scope == PersonalizationScope.User)
{
this.Label1.Text = “In personalized view”;
}
[/CSharp]

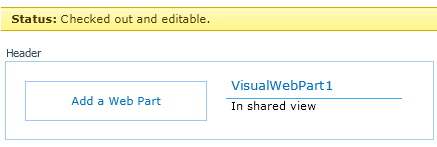
Obviously, if you wanted to target the shared view, you could change PersonalizationScope.User to PersonalizationScope.Shared in your if condition.

personalized.png

shared.png

While you are in each scope , it’s easy to toggle to the other one using the WebPartPersonalization.ToggleScope method.

Categories: SharePoint 2010 Tags: