How I Benefit from Native Boot From VHD
One of the neat features introduced in Windows 7 and Windows Server 2008 R2 (Read it Windows 7 Server!) is the support for native VHD boot right out of the box. This feature allows you to setup multi-boot scenarios on your machine a lot easier and safer than the traditional way of provisioning multiple OS partitions on your hard drive – something that we all have been doing for a long long time! All you need to do is to make a VHD as a bootable drive that contains its own OS (Win 7 or Win 2008) and then make your computer to boot from it. Snazzy!
Ever since the beta bits of Win7 and Windows Server 2008 R2 came out, some folks have written great blog posts, tweets and articles that walk you through the steps to prepare a VHD image for native booting and everyone is approaching this from a different angle – see References section later in this blog post.
The problem is that if you are not an administrator or you have no familiarity with the tools included in Windows 7, Windows Server 2008 R2 or WAIK , it’s quite challenging to follow most of those articles that are filled with technical or administrative jargons and involves lots of commands, utilities( For example WIM2VHD or PowerShell script) and various tools. Too much complexity for a dev guy, IMO!
My requirement for the use of native boot from vhd thing is so simple:
Scenario: SharePoint Dev,Demo and Validation Machine
Goals:
- To build a common , reusable SharePoint image that can be immediately used for dev, demo & testing purposes.
- To build this image using available user interfaces (i.e. Hyper-V Manager) with minimal use of command line and funky scripts or utilities.
Background: People who have worked with me know me as a person who loves virtualization! I run Windows Server 2008 on all my computers and don’t do anything except in virtual machines. However, in order to test my applications (for performance,stability and etc), I’d rather be on a real hardware.Although, there are techniques to even virtualize test resources, the safety net of having everything up and running and fully tested on a real box always gives me an extra level of comfort before any attempts to deploy my stuff to a customer’s environment.
Additionally, I do a lot of presentations, so that would be nice if I could demo on real hardware too with no emulation layer that may degrade the performance of my presentations. By leveraging native boot from VHD, now I can have either Windows 7 or Windows Server 2008 R2 as my main OS and spin up extra bootable VHDs and multiboot them in a blink of an eye.
I think the ability to boot from VHD (natively) is like having a heap of computers sitting around at your disposal! Use them when you need them; otherwise leave them in your garage or throw them in the garbage bin if you will.
All right, enough talking. Let’s just go ahead and get busy.
Step 1 : Create the Initial VHD
There are several ways to create the initial VHD such as Windows Pre-installation Environment (a.k.a WinPE) or Disk Management MMC, but in this blog post I will be using Hyper-V Manager to create the initial VHD. Like I said, I prefer this method simply because it gives me a user interface that leads me through the process, and more importantly I have a master virtual machine for future changes.
The creation of initial VHD in “Native boot from VHD” articles is often a point of confusion for some readers. It’s like the mystery of “Egg or chicken, which one came first?”.
- Start Hyper-V Manager and click Actions menu> New>Virtual Machine. Note this virtual machine will be referred to as “Master Virtual Machine” throughout this blog post.
- Specify a Name and Location for the new virtual machine, adjust the Memory and configure Networking.
- Connect Virtual Hard Disk step is important though. The VHD specified in this step will be the one you will be using for the rest of this blog post and it’s important that your virtual machine is using this VHD only. I used an expandable VHD with the maximum size of 60G , but for a typical SharePoint machine 30 to 40 G should be a good start. You can always go back to your VHD and expand or shrink it if you need.Here is a good guide that explains all the tasks you can do with a virtual disk in great details.
- Go ahead and complete the wizard to create the new virtual machine.
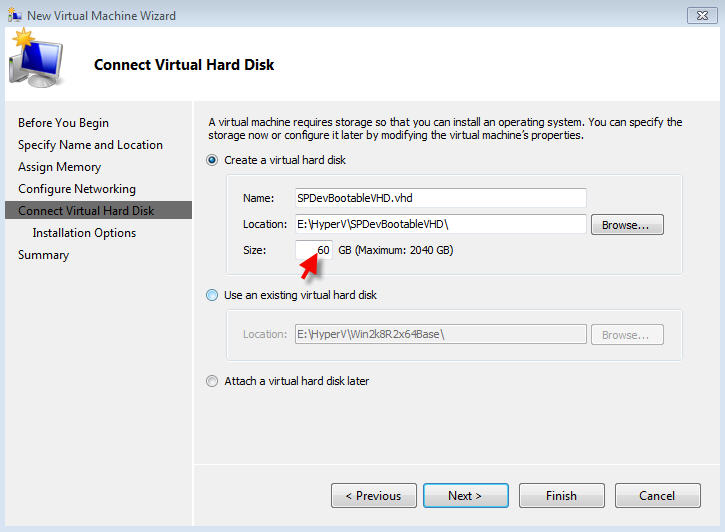
If you happen to choose your virtual disk to be of type expandable , make sure that the maximum size you specify is available on the destination drive. Booting to an expandable VHD with not enough space on the destination drive can get you a blue screen indicating that Windows failed to start up due to lack of space required or something along that line.
Step 2 : Install Your Programs on the New Virtual Machine
- Launch the new virtual machine and activate its OS with an appropriate license.
- If you, like me, find it annoying , you can disable the Shutdown Event Tracker.See this article for more information.
- Install SmarterMail (see this post) , but do not create a domain , nor any users. Just install it!
- Install IIS, Office , VS.NET and pretty much any other applications that can survive sysprep.
- Install SharePoint , but DO NOT RUN THE CONFIGURATION WIZARD.
- Add SharePoint folders to a virtual library which is yet another great feature offered by Win 7 and Win Srv. 08 R2 (Read Ishai’s post here)
- Install SQL Server 05, 08 or R2 CTP , but DO NOT START THE SERVICE or restart the virtual machine. Actually, when installing SQL Server , in one of the wizards it asks you for the service accounts. In that wizard, make sure SQL Server DB Engine service is set to manual so it’s not started after the installation is completed. Install SQL at the end so you can directly jump to the next step (Step 3)
At this point , your virtual machine should be activated and ready for further processing.

Step 3 : Sysprep the Virtual Machine
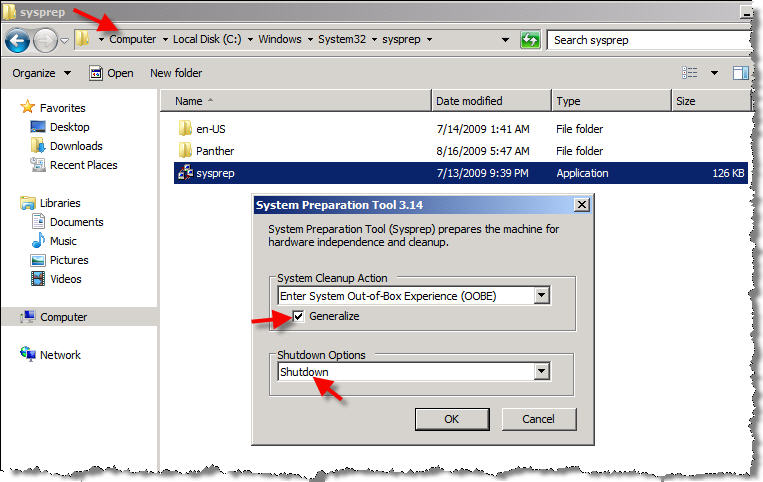
Since we are preparing the VHD for a move from a virtual environment (Hyper-V) to a number of physical environments , the steps to seal the VHD is easier than the other way around. In the virtual machine, open up a Windows Explorer and navigate to C:\Windows\System32\sysprep.Double click Sysprep.exe to prepare and generalize the OS within the virtual machine, as shown in the figure below.
Once the sysprep operation is completed, the virtual machine will shut down. At this point you can clone or migrate the operating system image to other computers.
Step 4 : Prepare the VHD for Native Boot
Up until now, whatever we have done is like what other blog posts ask you to do using ImageX utility (Part of WAIK) or WinPE + Windows installation media to create a VHD that has either Windows 7 or Windows Server 2008 as its OS! Now we need to make the VHD bootable.
In order to properly make the VHD bootable, you need to know what you want to do with it next. You have two avenues to take:
- You want to distribute the VHD for multi-booting inside other virtual machines. <– _Not covered in this blog post_
- You want to distribute the VHD for native boot in other computers (or the same computer you are running hyper-V).
For native boot , you need to take the following steps:
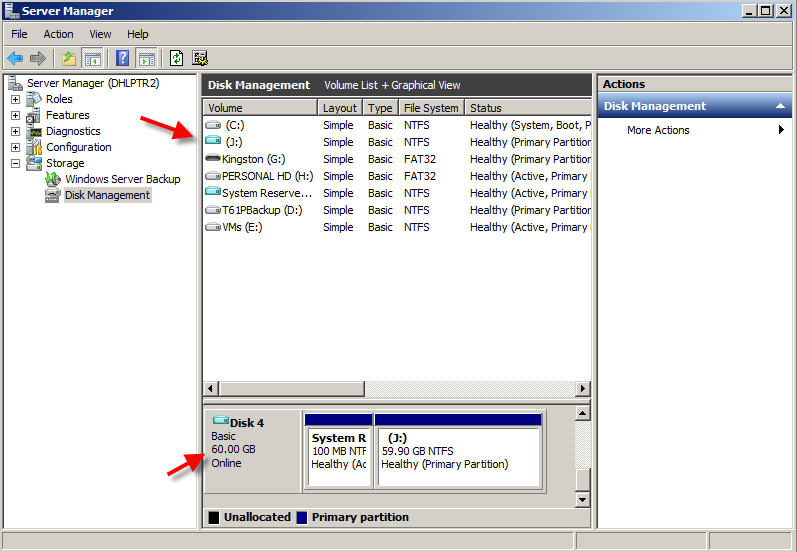
- Copy the VHD to another computer and the volume that should host the VHD, as shown in the figure below.
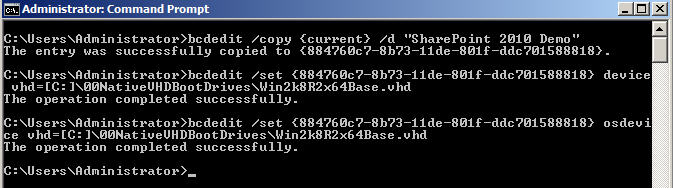
- In the destination computer, open an elevated command prompt and run this:
- Note the GUID in the output and copy it to the clipboard.
- Next, using the GUID from the clipboard, run the following two commands:
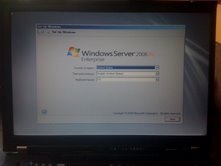
- Go ahead and boot up the the host OS. I have attached screenshots (taken by my iPhone) from the Boot Menu in two of the 5 computers I deployed the VHD. Now, you can imagine , how much time I saved by utilizing this technique!

bcdedit /copy {current} /d “your boot menu description goes here”
bcdedit /set {GUID} device vhd=[DriveLetter:]\Folder\<New_VHD_Name>.vhd
bcdedit /set {GUID} osdevice vhd=[DriverLetter:]\Folder\<New_VHD_Name>.vhd
* Pay attention to the brackets around DriveLetters and GUIDs.

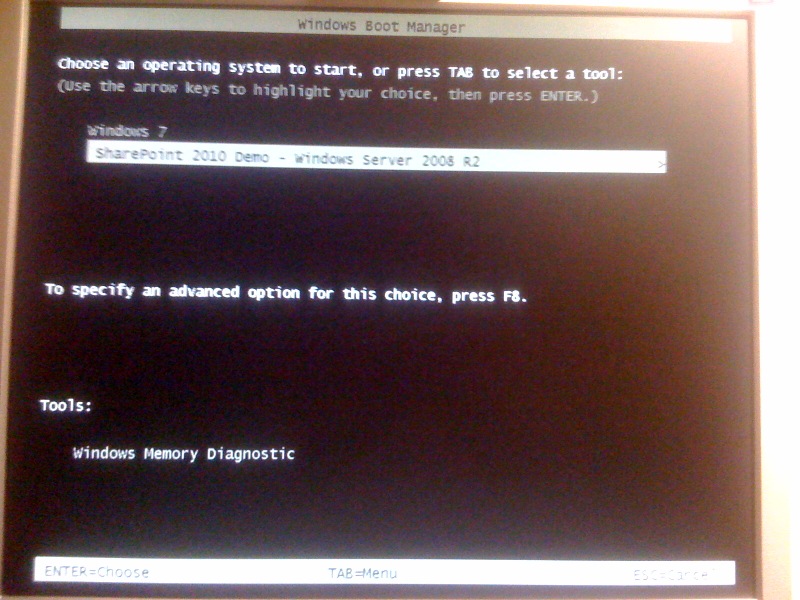
My Laptops: My Desktops:
Multi-boot with Win Srv. 08 R2 Multi-boot with Windows 7
Step 6 : Final Touches
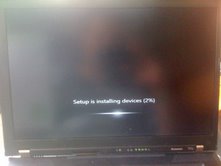
After the new machine boots up, it takes 5 or 6 minutes to assign the new SID and get you to the first screen. It’s certainly much less than full blown OS installation (it better be 😉 ).
During the initial process , one more restart happens until you get to Windows Mini-setup screen. At this point , setup prompts you only for required and user–specific information, such as accepting the EULA and , resetting password and etc.

Once your desktop shows up, you can change the machine name, join it to a domain or any other final touches.Run the SharePoint configuration wizard and setup smarter mail , and viola!
You have a full blown SharePoint/Dev/Validation environment that is running on the hardware *NOT* in a virtual machine. It’s pretty cool.
A couple of tips need to be highlighted here:
- Some of editions of Windows 7 and Windows 2008 Server R2 don’t support Native boot from VHD. For more information read page 6 of this document.
- Like I said, native boot from VHD is like having a bunch of computers around. If you ever decide you no longer need it, no worries. All you need to do is to open an elevated command prompt in the host OS and run the following command and then physically delete the VHD from the volume!
- The beauty of the method presented in this blog post is that you can always go back to your master virtual machine, change things around, reseal and distribute the VHD!
- VS 2010 Beta 1 runs much faster in a native boot from vhd than a VM. It’s partly due to VS 2010 being heavily based on WPF and emulating the graphics card in VMs forces WPF to run into software rendering mode and kills the performance big time. So far, every time I’ve fired up VS 2010 in a VM its taken 5 mins to get frustrated with the performance and give up! Obviously VS 2010 is still in beta and lots of improvements will be made in future , but in the interim, native boot from vhd is pretty much the only way that allows me to evaluate VS 2010 dev experience without having WPF running into software rendering mode, frequent crashes and performance headaches.
- Optionally, If you want to multi-boot several VHDs into Boot entry ,you can follow the same steps explained in this blog post. I guess, the limit is what capacity your hard disk has!
- In the host OS , you can mount/unmount your VHD as shown in the below figure. This makes the file management of your VHD easy. No need to boot to the VHD if you just need to transfer a bunch of files to it.Right?
bcdedit /delete {Guid} /cleanup
References:
- Virtual Hard Disk Getting Started Guide White Paper
- Install-WindowsImage PowerShell Script
- Windows(R) Image to Virtual Hard Disk (WIM2VHD) Converter
- Windows 7: Boot from VHD First Impression: Part 2
- Less Virtual, More Machine – Windows 7 and the magic of Boot to VHD
- How-to: Burn your Windows 7 or Windows Server 2008 R2 .ISO to DVD disc

Awesome article Reza! Definitely a recommend it!
Thanks bro!
Great post mate! Yep I’ve just been down this journey this week and learnt the hard way that you need to create the VHD in HyperV first not follow Boot-VHD imagex way because otherwise they won’t run in HyperV. Once the Boot-VHD image has run, can you sysprep it again and then run in HyperV?
Hey Reza. Very, very cool.
tk
@Jeremy Thake
Thanks Jeremy. I never tried that approach simply because the master image I create in step 1 can always be opened up , changed and syspreped again for redistribution. I guess that’s another reason I like this method as stated at the end of this post.
@Todd Klindt
Todd, if one of my three favorite SharePoint admins thinks there is value in this blog post, then I’ll really take it as a complement 🙂 Thanks!
If I have an existing VM image created with hyper V, but it already is a domain controller and SP is configured…what issues will I run across if I run sysprep or set it up to boot from vhd?
@Ryan McCutchen
I _think_ your SharePoint instance won’t survive as the syspep operation wipes out the machine name and the new image is not recognized as a valid WFE in the farm. If you have SQL installed on the same box , it’s even worse because the default/named instance will be changed to.However, you should be able to re-run SharePoint config wizard (you can’t even disconnect and you know why, right? 🙂 ) and recreate a whole new farm because SharePoint binaries are already there and they will survive like any other client apps… Hopefully, you are using this machine for evaluation or dev purposes and not in production!!
I’m not admin kinda guy, but 99% sure that you have to sysypep just before dcpromo-ing your box cause domain controller is too complicated for sysprep.
Also make sure the OS you have on VHD is supported from boot from VHD before going through any steps. That’s the first thing I would check 😉
Great article, very useful! I can’t wait to give this a try. I was wondering why VS2010 was running so slow in VMWare. THe WPF makes sense – must be killing it!
Great article… thanks!
I think that native boot from VHD is THE killer app in Windows 7 — but what amazes me is Microsoft’s choice on how to implement it.
When I first heard about the feature, I was hoping that it’d be OS-agnostic — imagine having a VHD for Win7, and another one for Ubuntu, and another one for WinXP. (Thinking that it wasn’t a technical issue that prevented that scenario — see Virtual PC.)
One of the things I’m wondering about is, what *exactly* did Microsoft change in the boot sequence for Windows 7 to accomodate their approach?
Also, has anyone given any thought on what it’d take to build a boot manager that would support VHDs (for other OS’s in addition to Win7)? Just how hard would it be to write a device driver for VHDs, anyway? 🙂
This method enables developers to test software on different operating systems without the cost or hassle of installing a second hard disk or creating a separate partition on a single hard disk.
Hi!
I have a question for really experts.
I boot directly from vhd (windows 7 ultimate) without any other system installed. I divided my hdd 320 gb into two partitions/volumes 100 gb and 197 gb
(remaining place 23 gb may be used by fat). the vhd was set to (i do not remember in detail) – i think – to 97 gb. after some updates for windows the blue
screen of death appeared with “VHD you must have enough capacity on the underlying disk to fully expand the VHD”. so i did a look on the facts. booting with
dos showed me the the vhd is about 18 gb large. i changed the two volume sizes with acronis disk director suite to 150 gb and 147 gb. after that the pc
started up normal without blue creen of death. then i opened the windows explorer and look at the free and occupied space of the started vhd and the two
volumes. and here i found something very interesting:
started vhd: free 78,4 gb /total 95,7 gb which compares to 100.000.000 mb which had to be set in diskpart
volume 1: free 47,5 gb / total 148 gb
volume 2: free 142 gb / total 149 gb
now my question: under dos the vhd only occuppy 18 gb which expand after starting from it to the set 95,7 gb,. that is ok. but on volume 1, where the vhd
lies, the started vhd uses 100,5 gb (148-47,5=100,5)!!! and 100,5 gb is larger than my set 100 gb for volume 1. that should be the reason for the blue
screen. but what i not understand is:
why expand the vhd over 100 gb when there is only 18 gb occupied under dos. i expected that the vhd file expands when the 95,7 gb runs full, not that it
expands when nearly 80 gb are free in the vhd. can someone explain this because this is not the purpose of a vhd?
another questions is: where are the 4,8 gb, difference between 100,5 gb (if vhd is startet, occupied on volume 1) and the shown size of 95,7 gb of vhd in
windows explorer? or i misunderstood something or mismatch some figures.
if someone can explain me this facts this may help a lot of other people to set the size of the vhd more sensible.
with kind regards
Rainer