Archive

Archive for the ‘SharePoint 2010’ Category

Fix: Publishing Hyperlink Issue

June 13th, 2013 No comments

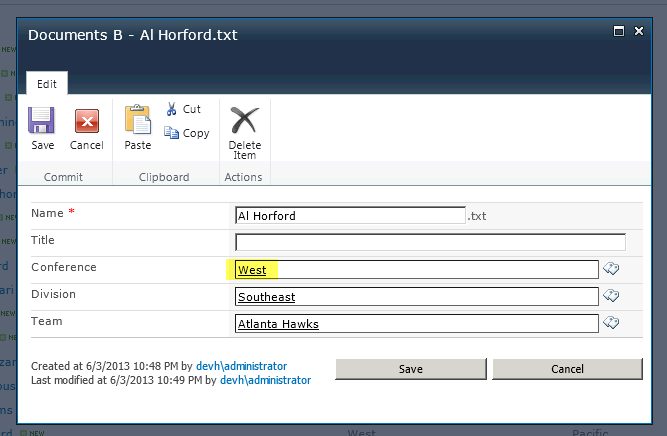
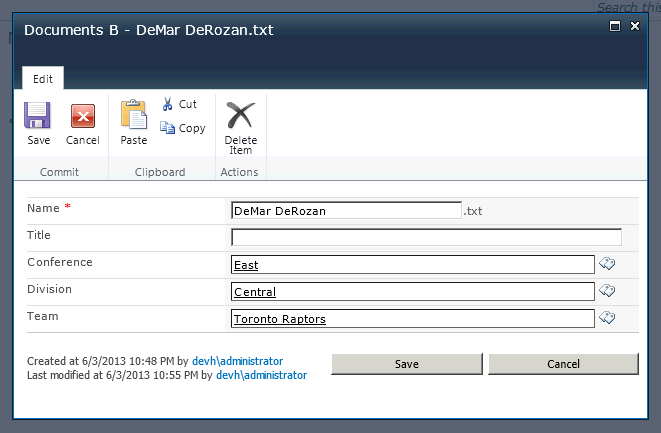
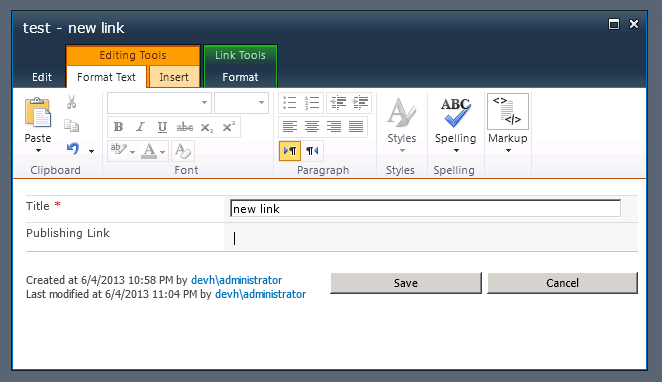
If you have used the Publishing Hyperlink as a list column before, you might have run into the following problem. Create a new item with a link.

pubHyperLinkBug1

pubHyperLinkBug2

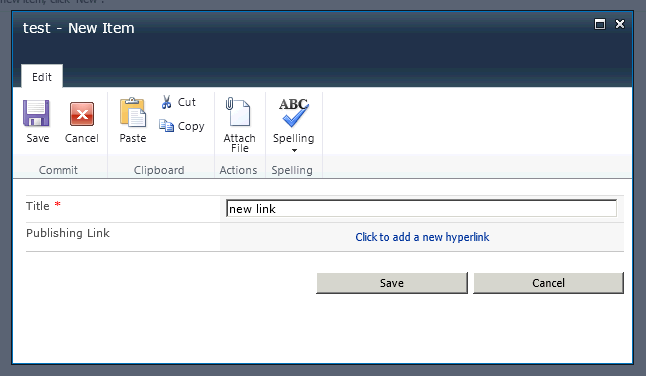
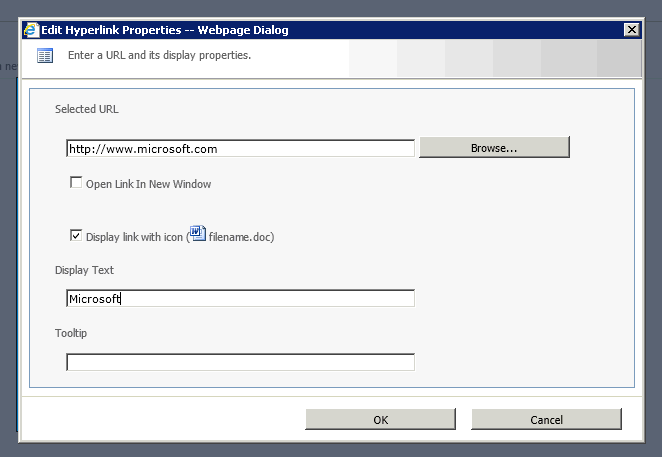
The item is created properly and the link works correctly.

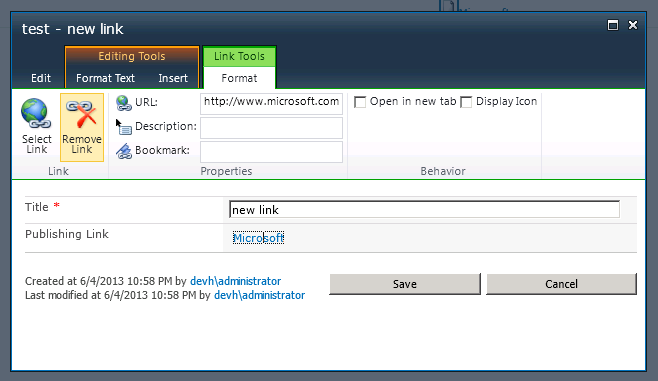
Now,  you don’t want to have a link for this item so you edit the item and click “Remove Link” and save the item. All is well.

pubHyperLinkBug3

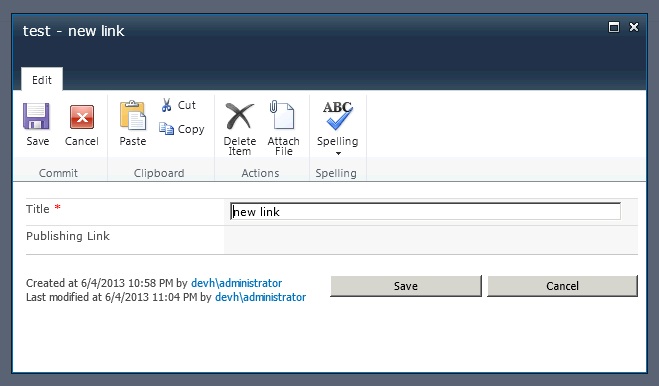
Now. you change your  mind again and want to add a link back. Surprisingly,  there is no interface to add the link back again . What happened?

pubHyperLinkBug4

Taking look at the html on the form there are 2 important things to note:

  • First, is that the link still exists.
  • Second, the text for the link has been removed. Below is the html that you will find:
<A contentEditable=true href="http://www.microsoft.com" rel=sp_DialogLinkIgnore UseInlineStyle="True" 
EmptyPanelId="ctl00_m_g_81960837_b91a_4d59_8fe4_8243facb3bbd_ctl00_ctl05_ctl01_ctl00_ctl00_ctl04_ctl00_ctl00_RichLinkField_EmptyPanel" 
AllowParagraphFormatting="False" AllowThemeFonts="False" AllowHtmlSourceEditing="False" AllowImageStyles="False" 
AllowFontColorsMenu="False" AllowLists="False" AllowTables="False" AllowImageFormatting="False" AllowHeadings="False" 
DisplayPanelId="ctl00_m_g_81960837_b91a_4d59_8fe4_8243facb3bbd_ctl00_ctl05_ctl01_ctl00_ctl00_ctl04_ctl00_ctl00_RichLinkField_AssetSelectedPanel" 
AllowImages="False" AllowFontsMenu="False" DisableBasicFormattingButtons="True" AllowReusableContent="False" AllowFontSizesMenu="False" 
AllowHyperlinks="True" AllowTextMarkup="False" AllowTableStyles="False" AllowInsert="False" AllowFonts="False" AllowStandardFonts="False" 
AllowImagePositioning="False" DisableCustomStyles="True" AllowStyles="False"></A>

So all is not lost, as a user, however, there’s no text to click on, you can still get to the link by tabbing through the elements on the page.  Now you will find the “Link Tools” tab available again.

pubHyperLinkBug5

Further if you move your cursor to another field such as the Title “Click to add a new hyperlink” will be available again.

Solution: By using some JavaScript added to the New Form and Edit Form, you can fix the behavior of the Remove Link button. Just hook up to the Ribbon events and then override the onclick of the Remove Link button.  The script then goes and removes the href from the anchor tag.

<script>
ExecuteOrDelayUntilScriptLoaded(function () {
    CUI.Ribbon.prototype.$L_old = CUI.Ribbon.prototype.$L;
    CUI.Ribbon.prototype.$L = function () {
        this.$L_old();
        $(document).trigger('tabSelected', [this.get_selectedTabCommand()]);
    };
}, 'cui.js');

$(document).on('tabSelected', function (e, selectedTabCommand) {
    if (selectedTabCommand == "LinkTab") {
        var removeLink = document.getElementById('Ribbon.Link.Link.Link.RemoveLink-Large');
        removeLink.onclick = (function () {
            var origOnClick = removeLink.onclick;
            return function (e) {
                var linkAddress = document.getElementById('Ribbon.Link.Link.Properties.LinkAddress');
                var linkValue = linkAddress.value;
                linkAddress.value = "";

                var linkHref = "#aspnetForm a[href$='" + linkValue + "']"
                var elemLinkHref = $(linkHref);
                elemLinkHref.attr("href", "");
                if (origOnClick != null) {
                    origOnClick();
                }
            }
        })();
    }
});
</script>

As a final note, if you want to delete the Publishing Link through the UI, without this bug happening, the URL field should be deleted instead of using the “Remove Link” button, or the script above can be added to your New Form and Edit forms.  

Categories: SharePoint 2010 Tags:

Designing Your Taxonomic Hierarchy

June 5th, 2013 3 comments

When using taxonomic hierarchies to classify information, managed metadata is definitely your best friend.  In SharePoint, taxonomic hierarchies can be defined using  two methods:

  • Method A: Single Column Managed Metadata 
  • Method B: Multi-Column Managed Metadata

In this blog post, We will use NBA teams classified by  Conference, Division, and Team names and will examine the pros and cons of each  method. We compare each method from the following perspectives:

  • Tagging Experience
  • Making Changes to the Hierarchy
  • Metadata Navigation
  • Search Experience

Method A – Create the entire hierarchy from a single termset in a single metadata column. The single column then can be used for tagging in a Document Library.

metadatatax01

Method B – Create the metadata using separate metadata columns. Multiple columns will be used to define data in a Document Library.

metadatatax02

Tagging Experience

Method A – Adding data in this scenario is straight forward and very structured.  You work your way through the hierarchy and choose the tag to mark the data with.

metadatatax03

Method B – Adding metadata in this scenario requires more attention.  There is a higher change of making mistakes when adding data, because the hierarchy is split up across multiple columns and there is no relation between the columns.

metadatatax04

Making Changes to the Hierarchy

Method A – When changes occur in the hierarchy, the Term Store can be changed to reflect this change without having to change any of the existing data.  For example, moving Toronto to the Central Division.

metadatatax05

metadatatax06

metadatatax07


Method B – Using the same example to move Toronto to the Central division, in method B each record must be updated for this change to be completed.

metadatatax08

metadatatax09


Metadata Navigation

As you probably know, metadata navigation was a big feature added to SharePoint lists and libraries in SharePoint 2010 . In SharePoint 2013, Microsoft took this to a whole new level, but that’s beyond the scope of this blog post.. For Lists in SharePoint two types of metadata navigation can be added: Navigation Hierarchies and Key Filters.

Method A – Navigation Hierarchies work very well in this case.  The navigation is easy to follow.

metadatatax10

Key Filters also work with method A, but get a little messy if you try to use too many terms.  The example below show a mix of divisions and teams.

metadatatax11

Method B – Navigation hierarchies do not work very well in the case of method B. Using the following hypothetical situation, if there were a Dallas Mavericks team in both the Southeast and Southwest divisions, from the navigation hierarchy alone you would not be able to filter for the one specifically in the Southeast or Southwest.  The only way to filter by the additional columns is to go to the divisions or conferences column and select the filter value, or use the Key Filters if they are turned on.  This leads to using multiple interfaces to get to the data you want which can become confusing.


metadatatax12


metadatatax13

Key Filters for method B work very well because the filter criteria is neat and organized.

metadatatax14

Search Experience

Method A – When using Search with Method A, only the tag used as the metadata applies to the data.  Take for example a search on David West.  Searching for Indiana Pacers will find David West; however, searching for Central or East will not find this item.

metadatatax15

metadatatax16

metadatatax17


Another example is to search for James.  In the results returned the only tags available in the refinement panel are the metadata values “Miami Heat” and “Houston Rockets”

metadatatax18

Method B – For method B since more metadata is being used to describe the data, each metadata value can be used in the search.  David West can be found using Indiana Pacers, Central, or East.

metadatatax19

metadatatax20


metadatatax21

Also for the James search, the tags returned are for the Conference, Division, and Team.

metadatatax22

Summary

To summarize everything, when using a single column with a complete hierarchy, data entry and metadata hierarchy management are easy to do.  Metadata navigation is also more intuitive to use.  However, when it comes to the search less information is available to find your data. In another word, search experience isn’t that great!

And for multiple columns, the opposite is true.  Data entry and hierarchy changes require more time to complete (and it’s easy to make mistakes). Metadata navigation hierarchy is less intuitive although key filters work best here.  But, if you are looking for good search criteria multiple columns is the better choice.

Categories: SharePoint 2010, SharePoint 2013 Tags:

Document Set Creator Web Part

May 9th, 2013 No comments

When working with content types we all can agree that the user interface that SharePoint provides is not the most intuitive one. Specifically when creating a new document set! The problem is that the document set is a complicated concept for the end users to digest. The complexity of SharePoint user interface for working with document sets adds to this complexity!

Complexity makes your SharePoint solutions seem too hard and casts doubt regarding how practical they are.

Imagine a page the shows a list of content types, their approval tasks, and maybe some other web parts. The add new item link provided by the List View web part does not allow users to create Document Sets. The way to work around this is to click somewhere on the list view to get the ribbon menu to show up, then click on New and select the Document Set from the drop down. That would be so many clicks, and for sure the end users wont like it!

Solution: To make life easier you can create a single click button to do this instead. This button is simple and intuitive to use. The solution is to takes advantage of SharePoint client side object model (CSOM) to create a new item. The screenshot below shows this button on a Web Part page.

docsetbtn1

Here is the main code for the Web Part.

<style type=”text/css”>.ms-uploadbtnlink { width: 300px; }</style>
<div style=”width: 100%” align=”center”>
<div class=”ms-uploadbtnlink”>
<button onclick=” javascript:NewItem2(event, ‘<%= DocSetDetails %>’);return false;” type=”submit”><nobr>
<img alt=”Upload a Document” src=”/_layouts/Images/uploaddoc.png”/> &#160;<span><%= ButtonLabel %></span></nobr>
</button>
</div>
</div>

In the code behind the Document Set Details are created and passed into the NewItem2 function.

DocSetDetails = “” + SPContext.Current.Web.Url + “/_layouts/listform.aspx?ListId=%7B” + List.ToUpper().Replace(“-“, “%2D”) + “%7D&PageType=8&RootFolder=” + rootFolder.Replace(” “, “%20”) + “&ContentTypeId=” + ContentType;

Highlighted are the List ID (ListId) and Content type (ContentType).

It’s possible to create this solution using a content editor web part or directly injecting the JavaScript code in the page, but the point is to develop it once and reuse many times over, so instead of changing the html and dealing with url encoding and IDs, create a Web Part with a tool part that allows you to select the list and the content type you want to use.

docsetbtn2

You can download this Web Part from Codeplex : https://docsetter.codeplex.com/

Categories: SharePoint 2010, SharePoint 2013 Tags:

Interesting Difference Between “View Only” & “Read” Permission Levels

October 26th, 2012 5 comments

As the saying goes, the devil is in the details! This meant to be a note to self, but I thought it might be helpful for some of you too. Here we go:

If John has “Read” permission level to a document named sales.docx, John is able to search and find this document and view it either in Office Web App on the server (in the browser), or in Office client on his computer.

If John has “View Only” permission level to sales.docx, John *can* browse to the document library and see the document, however John cannot open the document in Office Word client on his computer.  Lucky John, if Office Web App is installed, John is able to see the document online. Ok, I get it! John has “View Only” permission level and this level doesn’t have “Open Items” permission (See the product documentation here). So far so good…

Interesting part is here –> If John has “View Only” permission level to sales.docx, he is not able to find it using search.  Furthermore, if he types the URL of the document in the browser address bar (http://SharepointSite/doclib/sales.docx), he receives an Access Denied error. Now, I don’t get it! John has “View Only” permission level. He should be able to find the document via search, and see it using Office Web app just like how he’s able to do so when he browses to the document library and clicks on it!

This leads to two different security access behaviors:

  1. If a user has “Read” permission level to a document, they can always find the document using search or browser and open it in the browser or their Office client app.
  2. If a user has “View”Only” permission level to a document, they can only find and open the document in the browser. In that case, Search doesn’t show the document!

Conclusion: Looks like “Open Items” permission plays an important role in search security trimming on the core search result. This makes people with “View Only” permission level ( With No “Open Items” Permission) not to be able to search for the documents they are already authorized to view. Obviously, you can go ahead and change the OOTB View Only permission level , but then again, that’s not “View Only” permission level anymore!

Make sure you are aware of this difference when planning your site permissions.

Filtering Out Disabled Users

October 25th, 2012 No comments

Not sure if you noticed this, but in SharePoint 2013 when you setup a sync connection you can exclude disabled users by just clicking on a checkbox.


Given that, you no longer need to setup a filter like what you did in SharePoint 2010 ( see my blog post here):


Categories: SharePoint 2010, SharePoint 2013 Tags: